Appearance
Lights and cameras
Lights shape the scene; the camera decides what goes to air. Both are objects in the viewport: you place them, turn them and key them like anything else.
Add them from the 3D menu: Lights › Directional, Point, Spot, Hemisphere, Area, Softbox, Reflection card, and Camera.
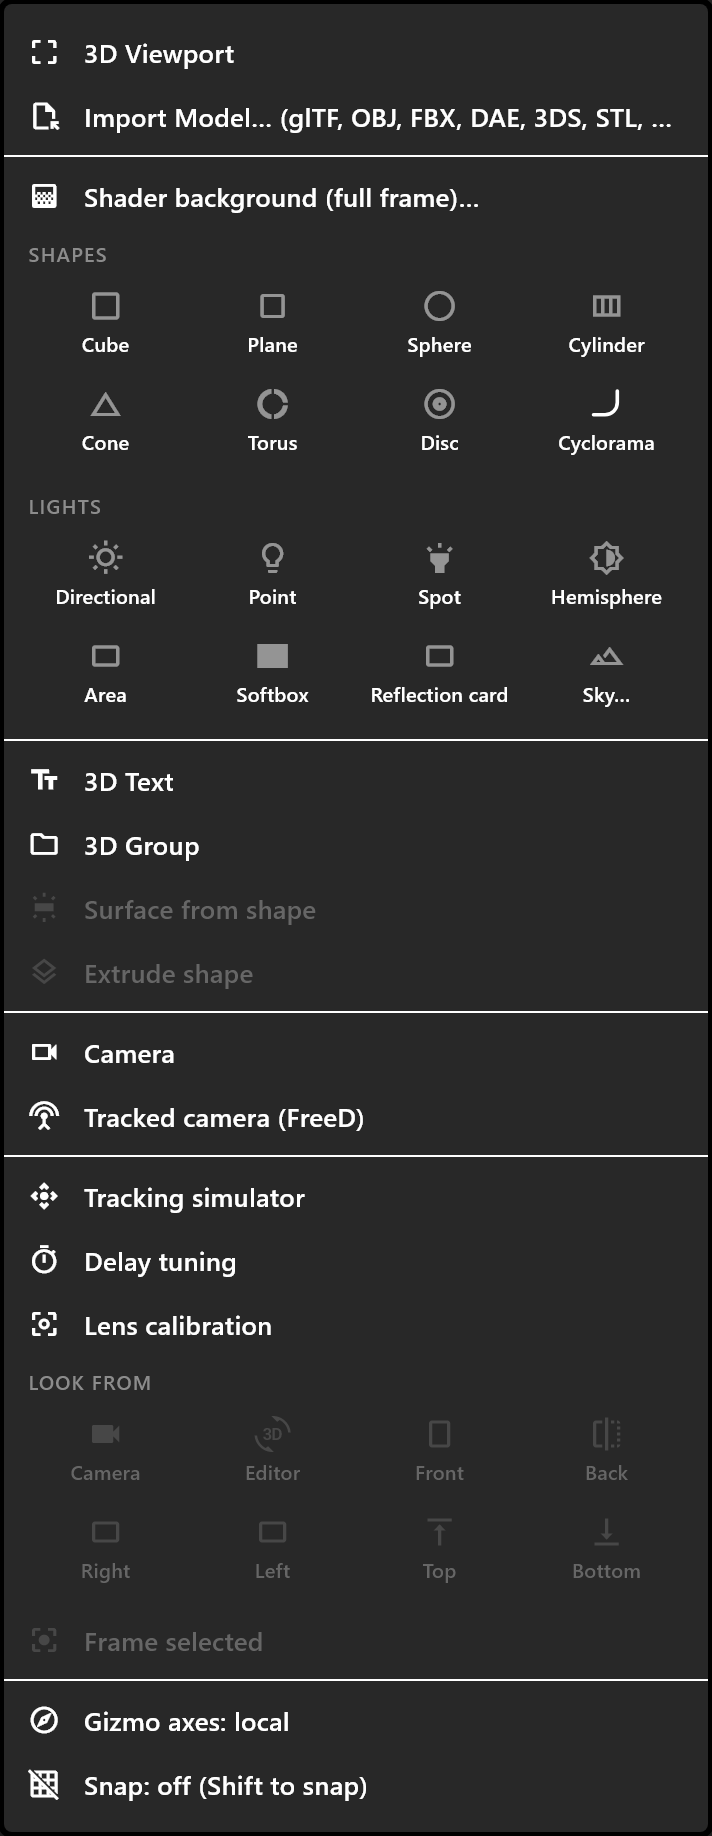
Area, Softbox or Reflection card? Three kinds of panel:
| Tile | What its tooltip says | Lights the set | Casts shadows | Seen in the shot and in reflections |
|---|---|---|---|---|
| Area | "A rectangle of light, unseen: soft light and soft shadows." | Yes | Yes | No |
| Softbox | "A studio softbox: a glowing panel that lights the set, casts soft shadows and shows in reflections." | Yes | Yes | Yes |
| Reflection card | A bright card the sky adds: "It casts no shadow and is not seen in the shot" | Softly | No | In reflections only |
A Softbox is an area light with its panel shown: see Softboxes. A reflection card belongs to the 3D layer's sky, not to the scene's objects: see Sky and reflection cards.
Lights
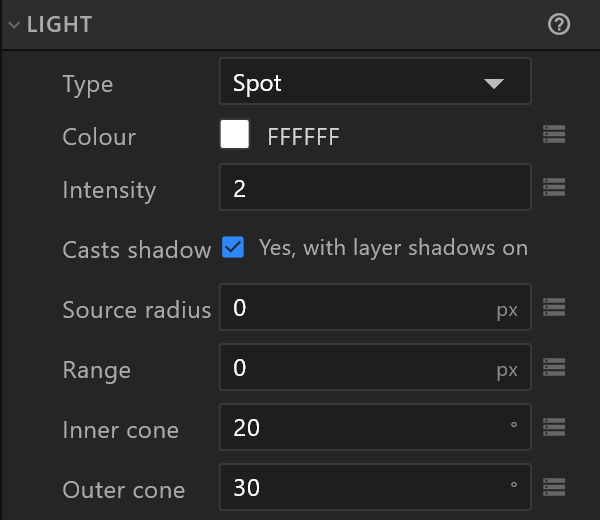
| Type | What it is | Good for |
|---|---|---|
| Directional | Parallel light from one direction, like the sun | The key light of a set |
| Point | Light from a point, in every direction, fading with distance | A bulb, a glow near a wall |
| Spot | A cone of light from a point | A pool of light, a highlight on one object |
| Area | A rectangle of light with a front, itself unseen | A soft key light; a glossy product's highlight in the panel's shape |
| Softbox | An area light whose glowing panel is seen | A studio light that shows in the shot and in chrome |
| Hemisphere | A sky colour from above and a ground colour from below | Soft fill, so shadows are never black |
Directional, spot and area lights shine down their own −Z axis: turn them with Rotation. A point light has no rotation.
| Row | What it does |
|---|---|
| Type | Changes the kind of light |
| Visible panel | Area: Seen shows the panel itself, to the camera and in reflections, which makes it a Softbox; Light only hides it |
| Colour (Sky colour and Ground colour on a hemisphere) | The light's colour |
| Intensity | How bright. An area light is as strong as a spot of the same value; a bigger panel gives the same light, softer |
| Width, Height | Area: the panel's size, 1000 × 600 px (1 × 0.6 m) for a new one |
| Two-sided | Area: Front only lights the side it faces; Lights both ways lights both |
| Range | Point, spot and area: past this distance, no light. 0 is no limit |
| Inner cone, Outer cone | Spot: full light inside the inner cone, fading to nothing at the outer. Close together, a hard edge |
| Casts shadow | Directional, spot, point and area: whether it casts, when the viewport's Shadows are on. Each object can also refuse: see 3D objects › Shadows |
| Shadow detail | Directional: one map, or two or three split by distance for sharper shadows near the camera. Three cost about three times one |
The viewport draws shadows from the first two lights that cast. See 3D viewport › Shadows.
Point lights have one more limit. Without ray tracing, only the first point light that casts gets shadows; another one lights the scene without them. With ray tracing, every point light casts, though at the lower tracing level only the strongest light is traced. The row's tooltip says so.
A spot's cone on the stage
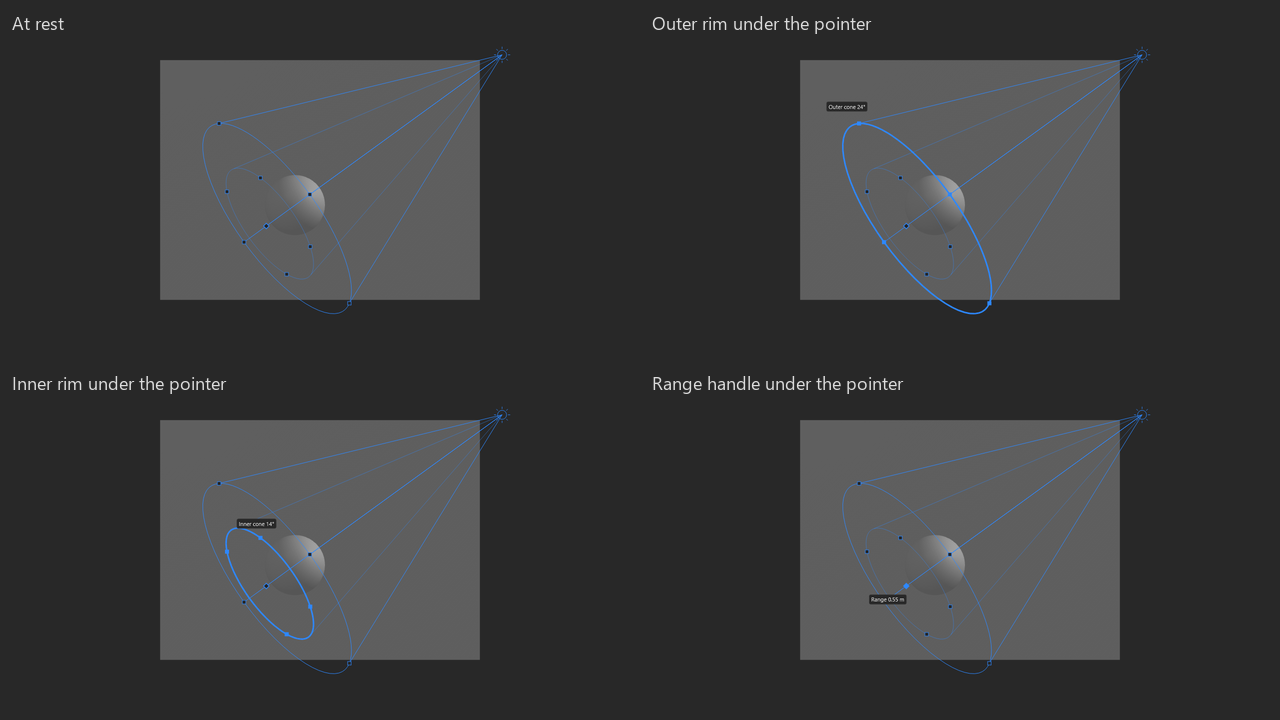
Select or hover a spot light and the stage draws its beam: the outer cone, where the light ends at the sides, and inside it, fainter, the inner cone: full brightness inside the inner cone, fading out to the outer. With a Range, the cone's rounded end is exactly where the light stops; with no range, the cone is drawn out to the middle of the set.
With the spot selected, pull its handles on the stage:
| Drag | What it sets |
|---|---|
| A square handle on the outer rim | Outer cone: how wide the beam is |
| A square handle on the inner rim | Inner cone: how soft its edge is |
| The diamond at the end of the beam | Range |
Hover a handle and its rim lights up, with a small chip beside the handle naming the value: "Outer cone 24°", "Inner cone 14°", "Range 0.55 m", or "Range: no limit". Drag to change it live. Hold Shift to snap to whole degrees and whole centimetres. The whole drag is one undo step, and in Animate mode it keys the value. The inner cone can't be wider than the outer one: the outer cone pushes it along. The handles hide while the graphic plays, when the light is frozen or locked, and with the rotate tool.
A point light's range on the stage
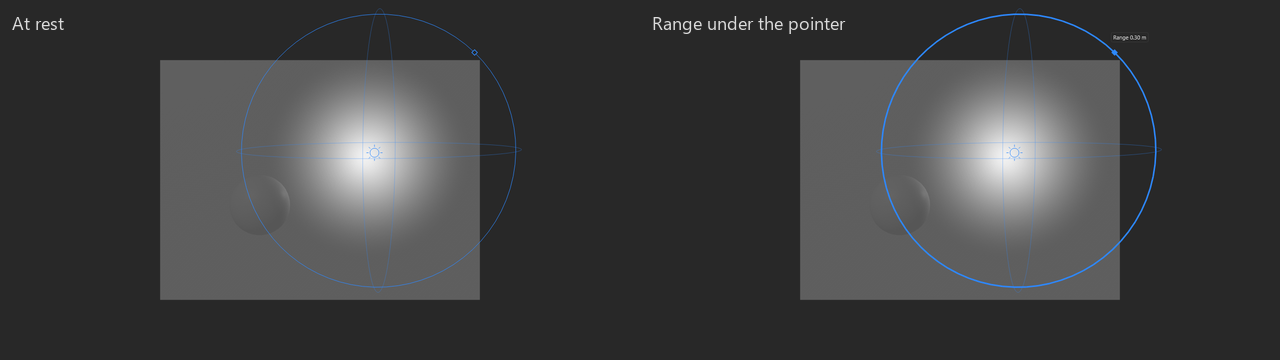
Select or hover a point light that has a Range and a sphere shows where its light ends: one circle facing you, and two fainter ones for depth. The light fades to nothing at that sphere. With the light selected, drag the diamond on the circle (up and to the right), or anywhere on the circle, to set the range to where the pointer is. Hovering lights the circle up with its value on a chip, for example "Range 0.30 m". It changes live, each drag is one undo step and keys the value in Animate mode, Shift snaps to whole centimetres, and it never goes below 1 cm.
With no limit there is no sphere, and the diamond sits just outside the light, so you can pull a range out of it. As with spot and area lights, the handles hide while the graphic plays, when the light is frozen or locked, and with the rotate tool.
Soft shadows
Source size (directional, in degrees) and Source radius (point and spot) say how big the light is: 0 is a point and a hard edge; the sun is about half a degree, a studio softbox a couple. The further an object is from what its shadow falls on, the softer the shadow. A point or spot light's soft edge is round; a directional light's is stretched along its direction.
Soft shadows are traced: they need Ray tracing and Traced shadows on the viewport, which Turn both on switches on for you, and a machine that traces. The stage shows them where this computer can trace; otherwise it shows the hard edge. Two lights at a time can have soft shadows.
Area lights
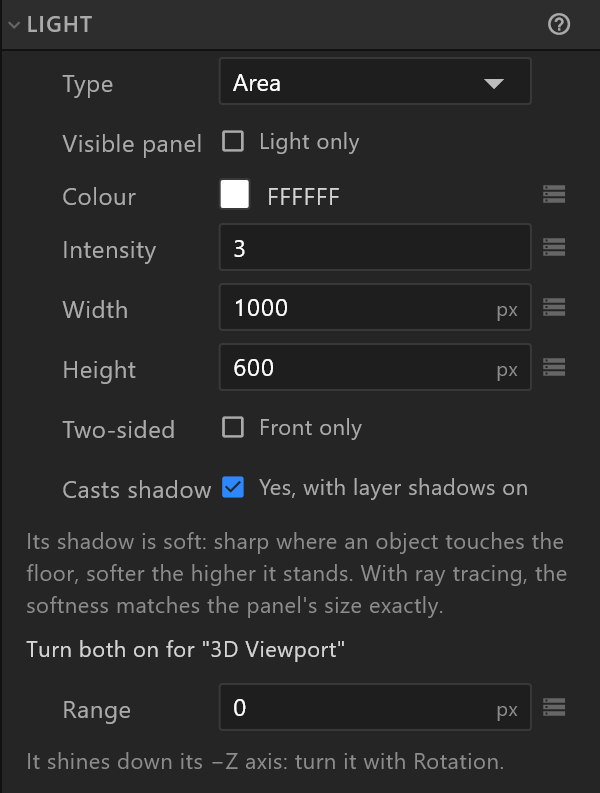
An area light is a panel of light. Selected, the stage draws its rectangle, with a small square at each corner.
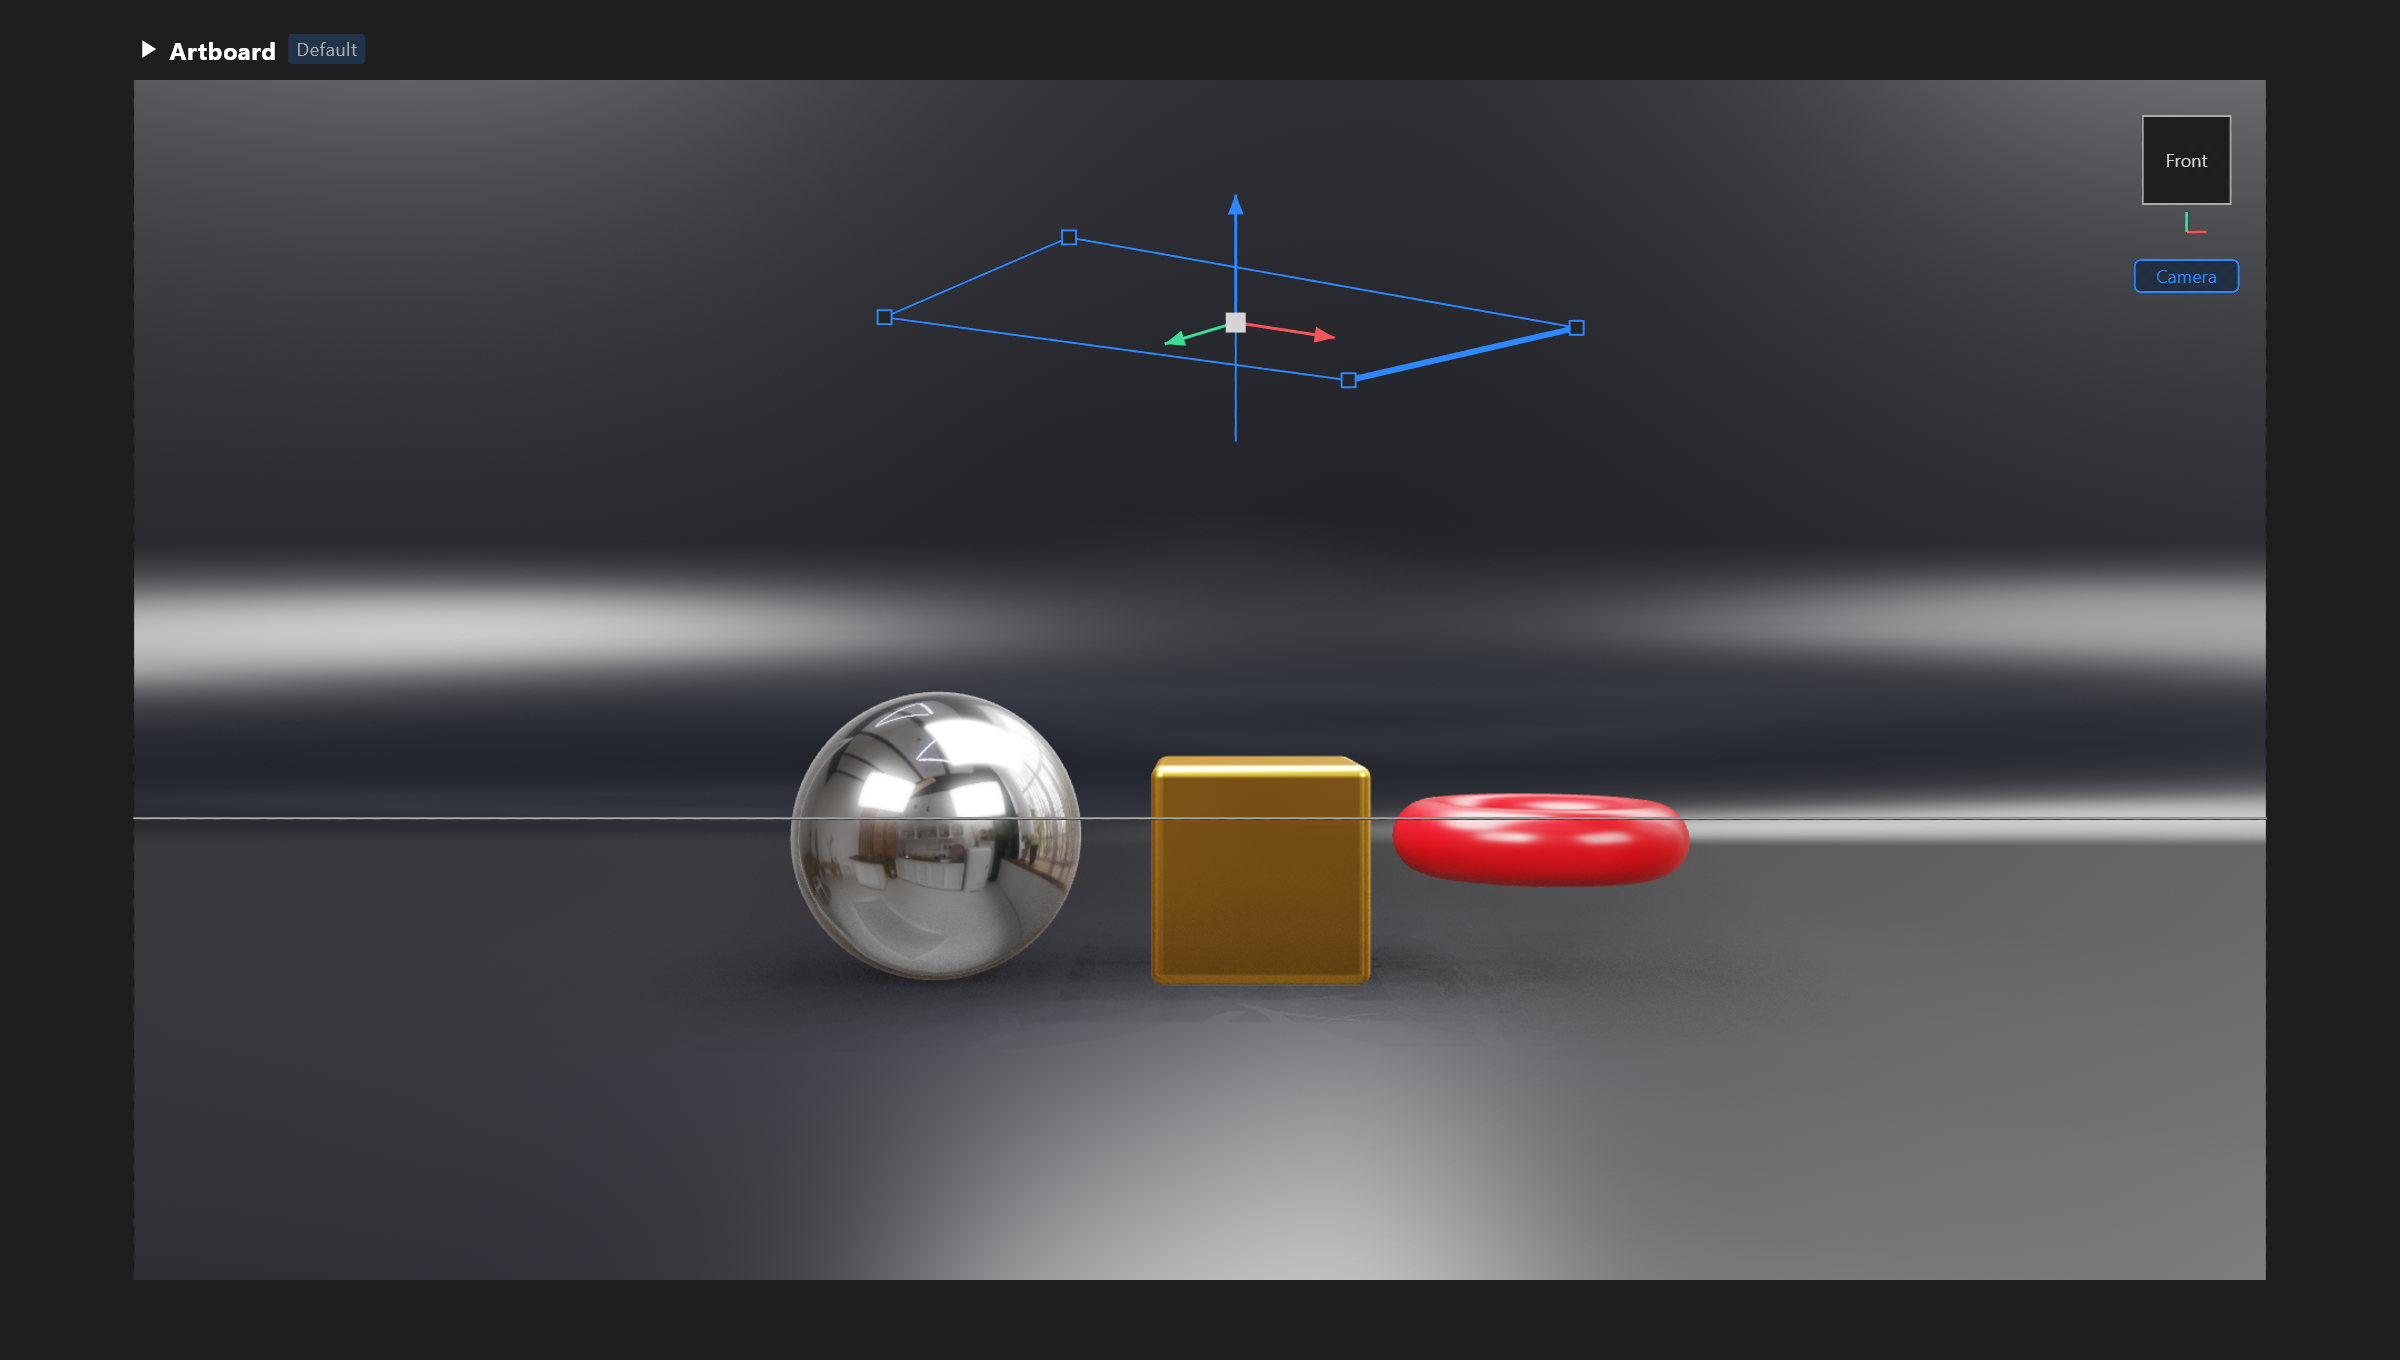
- A glossy object shows the panel. Its highlight has the panel's shape, and slides across the object as the camera moves.
- A matte floor gets a soft pool of light, brightest under the panel.
- Resize it on the stage. Point at an edge or a corner and it lights up blue. Drag an edge to move only that edge while the opposite one stays put; drag a corner to move both sides. It follows the panel's own plane, however the panel is placed or turned. Hold
Shiftto snap the size to whole centimetres. Where the move and scale handles overlap the edge, they win; with the Rotate tool, only the rings show. Each drag is one undo step. - Resizing changes the softness, not the amount. A bigger panel gives softer light and a bigger highlight; Intensity sets how much.
- Its shadow is soft, with or without ray tracing: sharp where an object touches the floor, and softer the higher it floats, as a studio panel's shadow is.
- Width, Height, colour and intensity can be keyed and bound like any light's: a panel can grow on a timeline or from the data.
Softboxes
A Softbox is a studio softbox: a glowing panel that lights the set and casts soft shadows, and is seen in the shot where the camera faces its front. It is an area light with Visible panel on Seen, so it has the area light's settings: Colour, Intensity, Width, Height, Two-sided and Casts shadow.
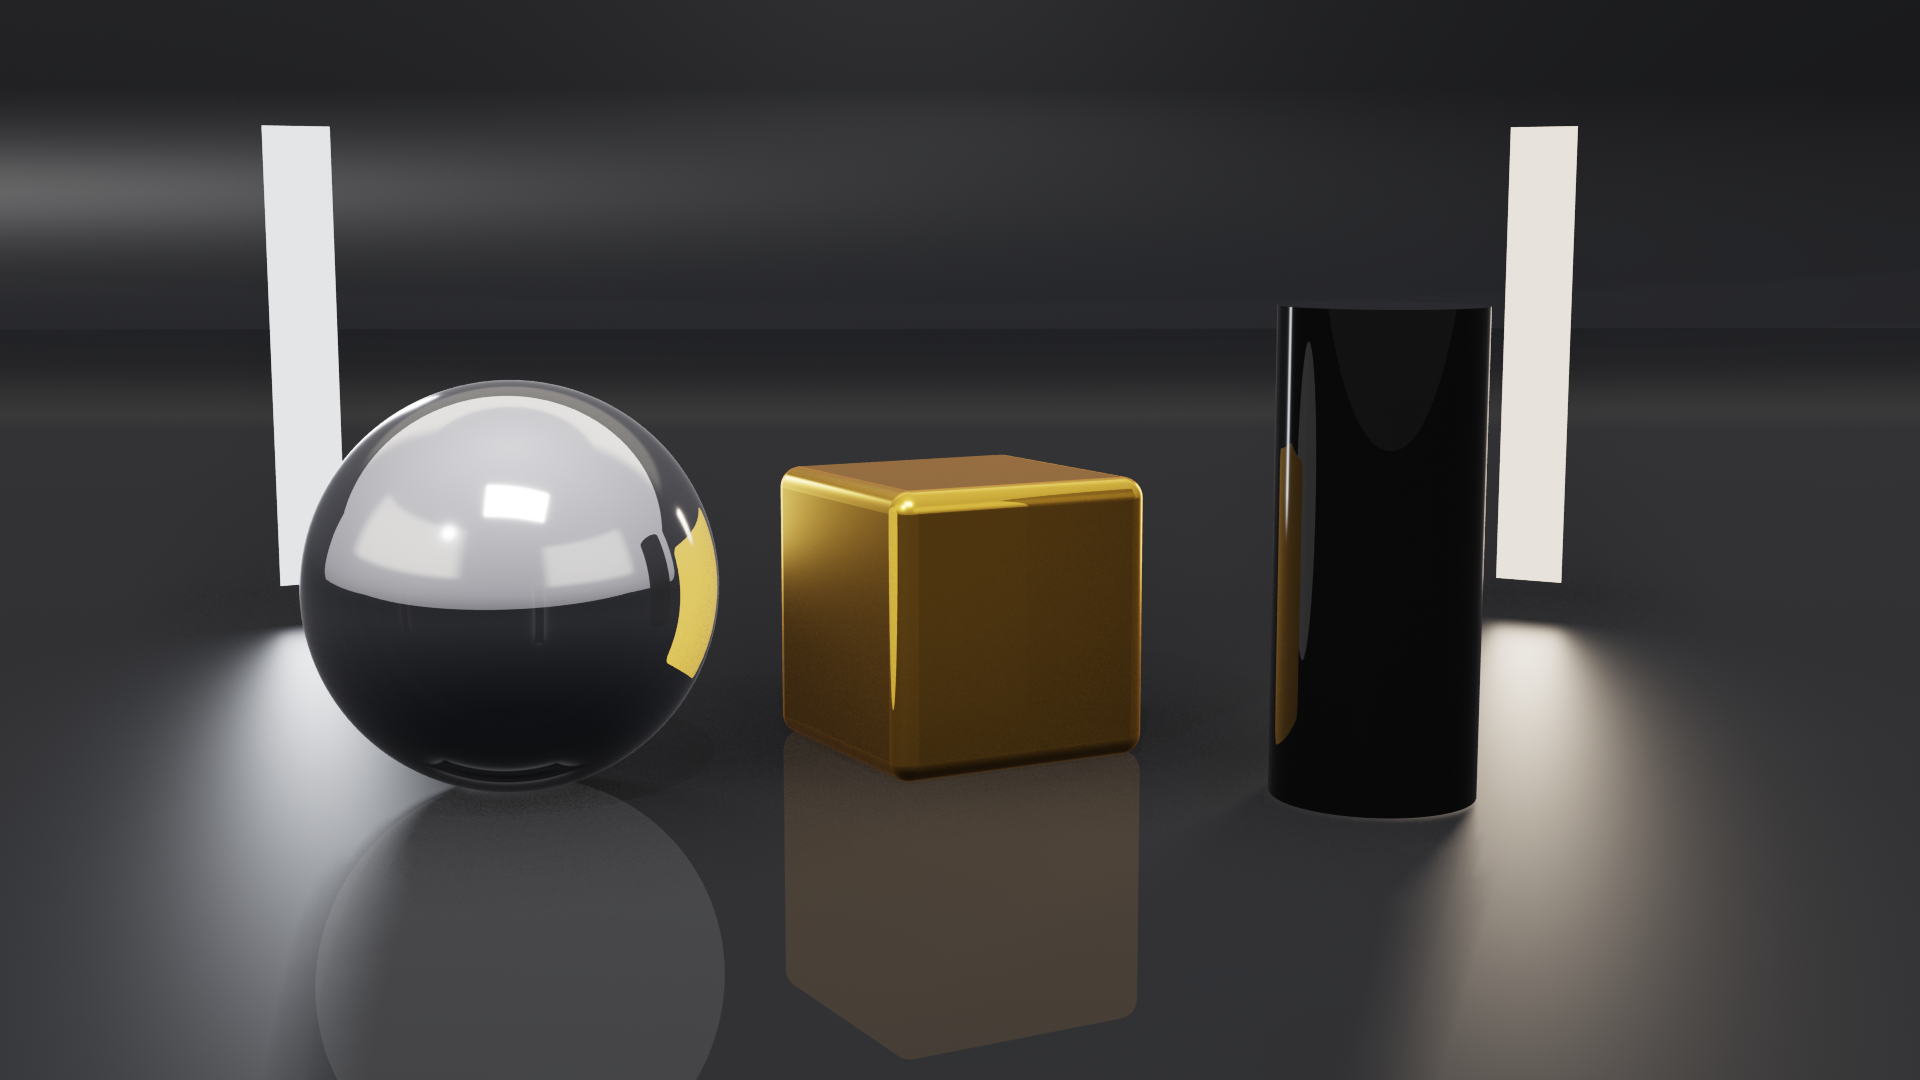
- Add › Lights › Softbox adds one 0.3 × 0.2 m, in front of the set on the left and above, turned towards it and wholly in view, so its edges and corners are there to drag.
- Size it on the stage like a rectangle: drag an edge or a corner. The panel and its light change together, live, one undo step per drag. Width and Height can be keyed and bound to data.
- Colour: the panel shows the light's colour, and the light it casts takes the same colour. A very bright coloured panel keeps its colour rather than burning to white.
- Visible panel › Light only keeps the light and hides the panel: a key light above the set, say, whose panel would otherwise show in a glossy wall. An area light becomes a softbox the other way round.
- One-sided, the default, is seen only from the front; from behind, nothing is drawn. Two-sided is seen, and lights, both ways.
- In shiny surfaces a softbox shows through its light's highlight: a rectangle the size and colour of the panel, sharp on chrome and soft on a satin floor. This works with or without ray tracing, so a softbox needs no reflection card.
- In the hierarchy a softbox has a filled rectangle; a plain area light, the outline.
Cameras
A new camera is placed where it matches the screen, so the picture does not jump, and becomes the one that plays.
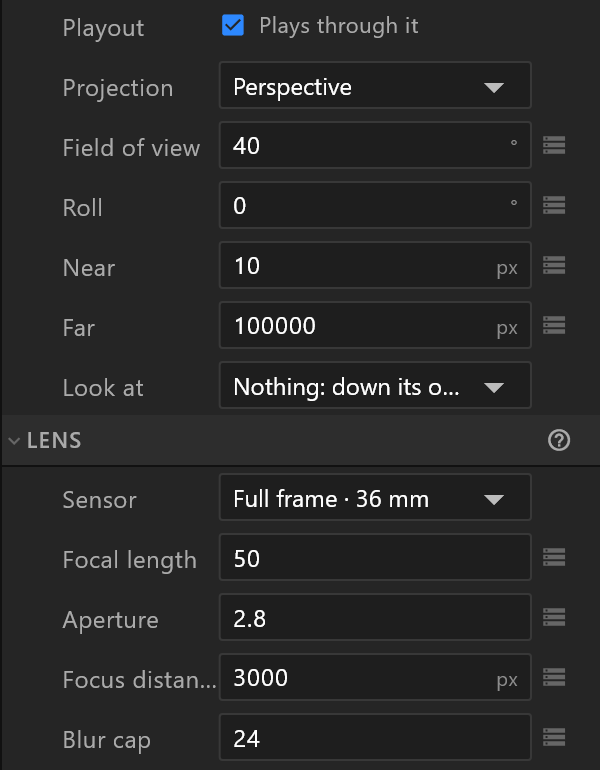
| Row | What it does |
|---|---|
| Playout | Plays through it: this camera goes to air. Tick another camera to switch |
| Projection | Perspective, or Orthographic (no perspective: sizes do not change with distance). A key on it switches exactly at the key |
| Field of view | How much it sees, in degrees, top to bottom. Orthographic has View height instead |
| Roll | Tilts the picture |
| Near, Far | The closest and furthest it draws |
| Look at | An object the camera always faces as either moves, or Nothing: down its own axis |
If the stage is looking through the editor camera or another camera, a selected camera says so twice: the panel says your changes change the file and not the picture in front of you, and a banner at the top of the stage reads "The stage is looking through the editor camera: moving "Camera" changes the file, not this view" ("…through another camera…" when a different scene camera is in use). Its Look through "Camera" button switches the stage to that camera. The banner does not show while the scene plays, or for the camera the stage already looks through.
I move the camera and nothing changes. The stage is looking through a different camera, so the move changes the file but not the view in front of you. Press Look through on the banner to see through the camera you are moving.
Lens and depth of field
Sensor gives the camera a real lens: Full frame · 36 mm, Super 35, Super 16 or Micro Four Thirds. With None, the field of view above decides. Choosing a sensor re-frames the shot once; after that, only the focal length changes the framing.
| Row | What it does |
|---|---|
| Focal length | In mm, as written on a lens: short is wide, long is close |
| Aperture | The f-number. 0 keeps everything sharp; a small number blurs what is out of focus |
| Focus distance | From the camera to what should be sharp |
| Blur cap | The widest a point may spread, in pixels: a limit on what the blur costs |
The panel says what stays sharp, "Sharp 2.4–3.9 m…", and the stage draws the plane in focus with its distance. The blur costs time every frame the aperture is open, so close it when a shot does not need it.
To see it at work, open the Depth of field template from the Start screen (3D): a tiled sphere up close and a chrome ball behind it, shot at f/2.8 and focused on the near sphere while the camera drifts.
Lens distortion
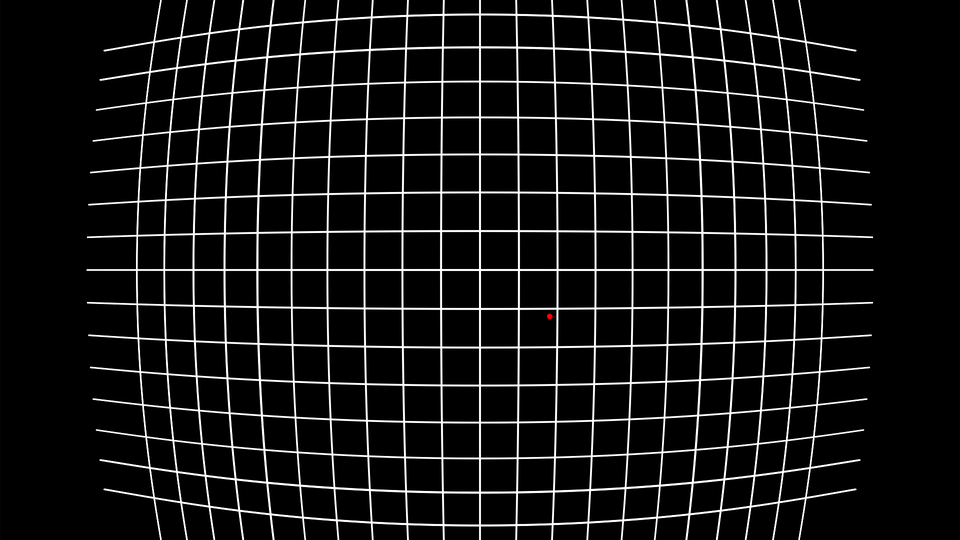
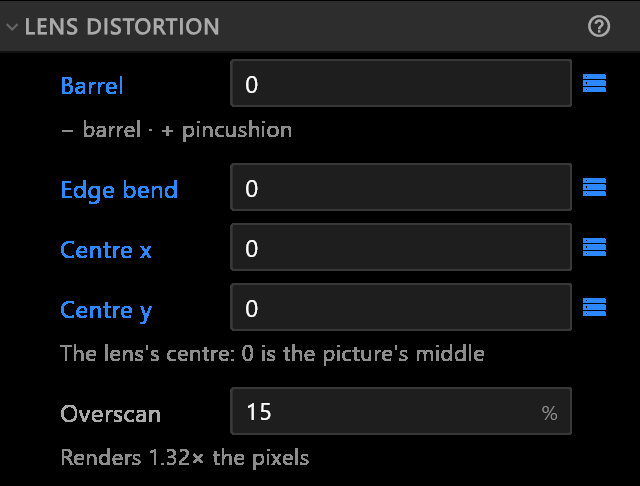
A real lens bends straight lines, a wide one most at the edges of the frame. LENS DISTORTION, below LENS on a perspective camera, bends the 3D picture the same way, so virtual lines curve as the studio camera's do and graphics line up with the picture right out to the corners.
A camera starts straight. Add a wide-lens bend gives it a gentle barrel to match by eye, in one undo step.
Then:
| Row | What it does |
|---|---|
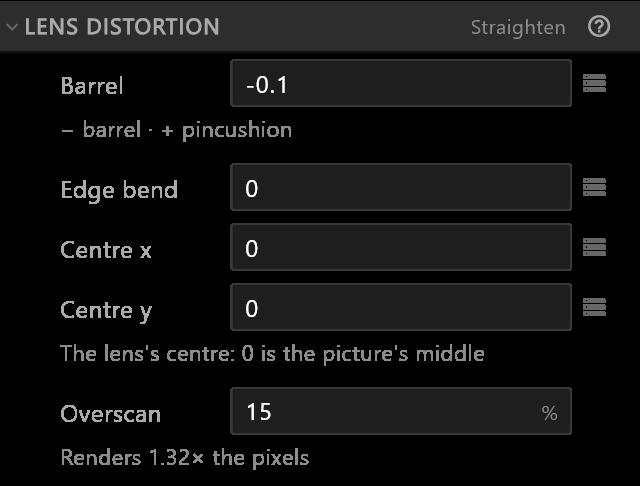
| Barrel | Below 0 bows straight lines outward, as a wide lens does; above 0 pinches them in (pincushion) |
| Edge bend | Bends the corners more than the middle. Usually small, and opposite in sign to Barrel |
| Centre x, Centre y | The lens's optical centre: 0 is the picture's middle |
| Overscan | How much larger the scene renders, so the bend has picture to pull in at the corners. Under it, how many more pixels that costs, "Renders 1.32× the pixels". 15 % holds a wide broadcast lens; at 0 % a barrel stretches the corners |
All but Overscan can be keyed and bound to data, and the frame cost under Quality counts the overscan. Straighten, in the section's header, takes the bend off again in one undo step.
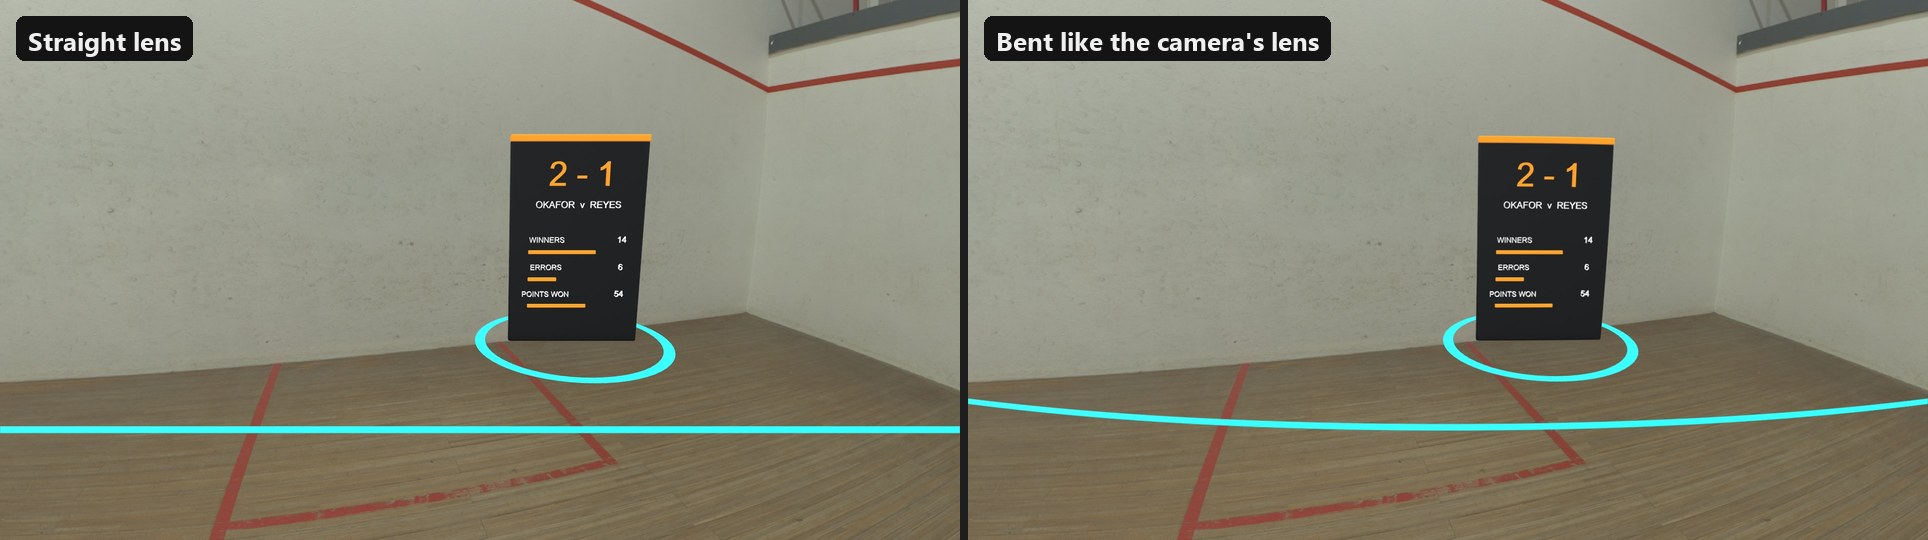
The court picture is a Poly Haven HDRI, CC0; the players are invented.
A tracked camera has these rows bound to the studio lens instead: airZ Engine reads the bend from its lens file, and on air the bend follows the zoom by itself. Its rows show as bound, with no Add button and no Straighten.
Two cameras in one shot
On the viewport, Blend to chooses a second camera and Camera blend moves the shot from one to the other, 0–100 %. Key the blend for a camera move between two framings. See 3D viewport.
To follow a real camera in the studio, see Camera tracking.