Appearance
3D objects
The things in a 3D scene: shapes, text, models made in other programs, groups, and copies of them in rows, scatters and particles. Each is placed, turned and scaled in the scene, and wears a material.
Add objects from the 3D menu (the small arrow beside the 3D button in the top bar). They go into the selected viewport; with none, one is made first.
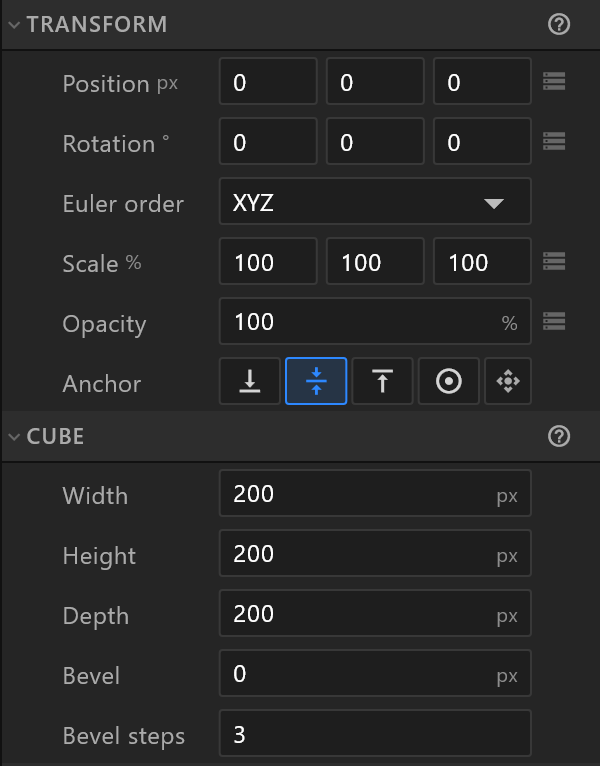
Transform
| Row | What it is |
|---|---|
| Position | X, Y, Z, in pixels (1 px = 1 mm) or metres, as the viewport's Units say |
| Rotation | X, Y, Z, in degrees |
| Euler order | The order the three turns are applied in |
| Scale | X, Y, Z, in % |
| Opacity | In % |
| Anchor | The point it turns and scales about: Bottom (it stands on the floor as it grows), Centre, Top (it hangs from there) or Origin (its own zero). The current one is lit; Bottom, Centre and Top are greyed while there is nothing inside to measure. One press sets it, as one undo step, and never moves the object: its position, keyed positions included, makes up the difference. The fifth button, four arrows, moves it on the stage: see The anchor |
In Animate mode a diamond beside each row keys it; the data glyph binds it to a view-model property. The frame icon beside the name looks at the object through the editor camera.
A value that is already animated keys at the playhead, with Auto-key on or off. Type it in the inspector or drag it with the gizmo, and a key is set there, so the change stays where you put it. With Auto-key off, a value that is not animated yet changes the object's starting pose, with no key. See Transport and playback.
The anchor
The anchor is the point an object, or a group, turns and scales about. The move, rotate and scale handles always stand on it.
To put it anywhere, select the object and press Enter (or Y, or Freeze in the toolbar), or press the four-arrows button at the end of the Anchor row. The anchor shows on the stage as a ring with a cross: drag it. It snaps, within 10 px, to the middle, the faces, the edges and the corners of what is inside, shown as white dots; hold Ctrl to place it freely. Press Enter or Esc when done. Moving the anchor never moves the object.
An anchor you place yourself lights none of the four buttons: that means it is your own point, not that something is wrong.
Hide an object with the eye on its row in the Hierarchy. Drag one row onto another to put it inside it; it stays where it is on screen.
Shapes
Shapes in the 3D menu: Cube, Plane, Sphere, Cylinder, Cone, Torus, Disc and Cyclorama. Each has its own size rows; sizes read in pixels (1 px = 1 mm) or metres, angles in degrees, and counts of segments have no unit.
| Shape | Its rows (starting values) |
|---|---|
| Cube | Width 200, Height 200, Depth 200, Bevel 0, Bevel steps 3. Width, height and depth stay separate, so a cube can become any box |
| Plane | Width 200, Height 200, Segments U 1, Segments V 1 |
| Sphere | Radius 100, Segments U 48, Segments V 24 |
| Cylinder | Top radius 100, Bottom radius 100, Height 200, Segments 48, Caps |
| Cone | Radius 100, Height 200, Segments 48 |
| Torus | Radius 100, Tube 30, Segments U 64, Segments V 24 |
| Disc | Radius 100, Inner radius 0, Segments 64, Arc start 0°, Arc end 360° |
| Cyclorama | Width 3000, Floor depth 2000, Wall height 1500, Curve radius 500, Curve segments 24, Width segments 1 |
More segments make a smoother surface, and a surface that a material's relief can move. Sizes cannot be keyed; scale can.
The cyclorama is a studio sweep: a floor curving up into a wall, with no edge for the camera to find. With an object selected, it goes under it — the floor's top at the object's lowest point, the wall behind it as the camera sees it, at least twice the object's footprint.
Text in 3D
3D Text adds text with depth. Its Text section holds the words (up to three lines) and the Font; the Geometry section its Size, Depth, Bevel, Profile (Flat, Chamfer, Round), Align, Tracking and Line spacing. Its Bevel and Sides can wear their own materials, or the face's.
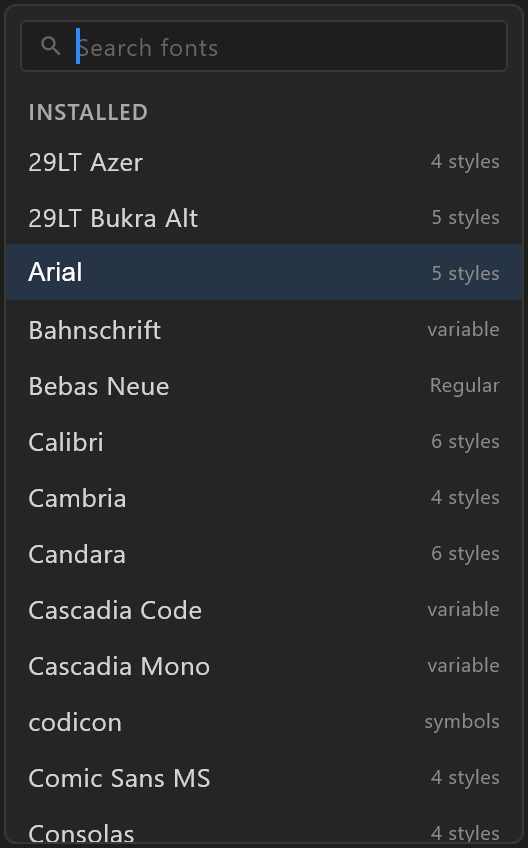
Font is the same field as 2D text's: it shows the family in its own face, Arial to begin with. Click it for the font picker: search, the document's fonts, and every family installed on this computer. The one you pick is carried in the document, so airZ Engine draws the same letters. The button beside it imports a font file that is not installed here.
Data text makes the words come from the data on air: bind the text row to a view-model property. Give it the Characters it may show — every letter, digit and sign the data might send — and a Max width. A character outside the set shows as "?"; a string wider than the maximum shrinks to fit. See Preflight findings.
From a 2D shape
Select a 2D shape or path on the artboard, then:
| Entry | Makes |
|---|---|
| Extrude shape | A solid from the shape's closed paths, named after it, with Depth, Bevel and Profile |
| Surface from shape | A thin surface — 2 mm — where the artwork is, with a new material: "Made a surface from "shape". The flat shape is still there." |
A shape with no closed path says so. The 2D shape stays; delete it if the 3D one replaces it.
Models from other programs
Import Model… reads glTF (.glb, .gltf), OBJ, FBX, DAE, 3DS, STL and PLY. A large model says "Adding N parts — the window pauses for a moment…".
What comes in, as one undo step:
- the model, with its parts as objects in a group;
- its textures (larger than 4096 pixels are scaled down, and the report says so) and its materials, named "model · material";
- its cameras and lights;
- its skins and shapes, and each of its animations as a timeline.
It is fitted to half the viewport's height. A notice says how many parts and triangles came in; anything the editor could not carry opens the import report.
Right-click the model in the Assets panel to place it again, or Replace from a file… to swap in a new version: each object keeps its work, matched by part name.
A model's parts can have:
| Section | What it holds |
|---|---|
| Model | Which model and part this is |
| Deform | Each shape (morph) of the part, in %, which can be keyed; and the Skin: move or key its joint objects to pose it |
| Size (on a group) | Half height stands the group half the viewport tall; Real size uses the file's metres |
Groups
Select objects and press Ctrl+G, or right-click in the Hierarchy and choose Group these N. The group's centre is the centre of what it holds, so nothing moves, and turning it turns everything about the middle. Set its Anchor to turn or grow it about another point, for example Bottom so the whole group grows up from the floor. Ctrl+Shift+G ungroups.
On the stage, a first click selects the group, a second the object inside.
Copies
Copies › Mode repeats an object without more objects to manage:
| Mode | What it makes | Its rows |
|---|---|---|
| Array: copies a step apart | A row or a ring | Copies (up to 256; key it to grow the row), Step position, Step rotation, Step scale |
| Scatter: random copies in a box | Copies placed at random | Scattered copies, Seed (the same seed places them the same way everywhere), Range ±, Turn ±, Size ± |
| Particles: emitted, living, falling | A stream: sparks, confetti, snow | Emit rate (a second; key it to 0 to stop), Life (seconds), Speed, Spread, Gravity, Spin, End size, Seed |
An emitter draws up to 256 particles alive at once — its rate times its life. Past that, older ones vanish early, and preflight says so.
Interaction: drag to rotate, turn or move
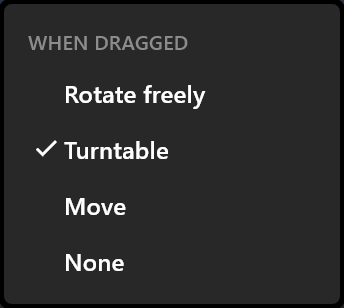
A 3D object can follow the pointer when a viewer drags it: a product spun on a turntable, a globe turned any way, a piece slid across a board. Right-click it, on the stage or in the hierarchy, and choose Interaction ▸. Under WHEN DRAGGED:
| Choice | What a drag does |
|---|---|
| Rotate freely | Turns it every way, like a globe |
| Turntable | Turns it around its upright axis |
| Move | Slides it under the pointer, on the floor or facing the camera |
| None | Nothing. It also removes the numbers the choice made |
A choice is greyed when a timeline already keys that motion, and says why, for example "Its rotation is keyed in a timeline": a key and a drag would fight over it.
The object's Interaction section, below Material, has the same choice under Drag, and its header names it: INTERACTION · Turntable. The settings for it:
| Row | What it does |
|---|---|
| Surface | For a move: The floor, or Facing the camera |
| Turn per drag | For a rotation or a turntable: how many degrees it turns for a drag across the whole view. 180° to start |
| Limit | How far it may go each way from where it stands, in degrees, or in mm for a move. 0 is no limit |
| When let go | Stays where the drag left it; Springs back, easing back to where the drag began, settled in about half a second; or Keeps going with the speed of the drag and slows to a stop, within the limit |
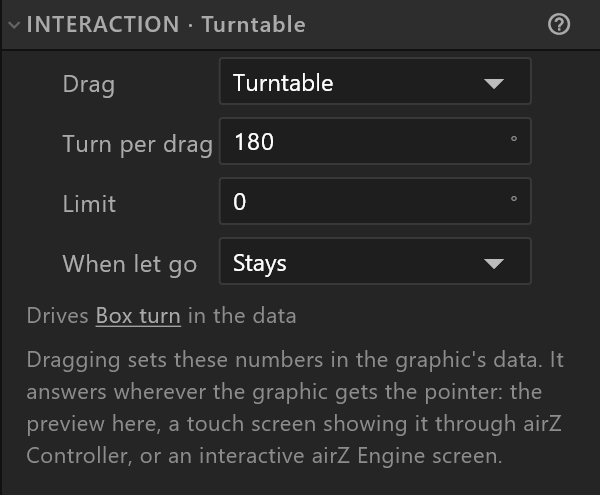
It works through the data. Choosing it makes numbers named after the object, such as "Box turn", "Box tilt" or "Box x", and dragging changes them. The line Drives Box turn in the data names them; click a name to see it in the Data panel. Because they are ordinary numbers, the same ones can be keyed, or set by data from airZ Controller, to put the object where a drag would. Where the drag works, and how it reaches air, is under Clicks and drags on air.
Listeners
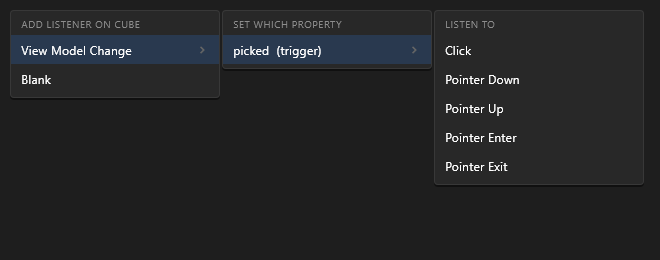
A 3D object can answer a click or a touch, the same way a 2D layer does: right-click a 3D shape or model, on the stage or in the hierarchy, and choose Add listener ▸. On the stage the right-click also selects the object, and its menu has Duplicate, Hide or Show, and Delete too. Lights and cameras have no Add listener. View Model Change sets a true-or-false, number, text or colour property, toggles a true-or-false one, or fires a trigger; Blank starts an empty one. Then choose what it listens to: Click, Pointer Down, Pointer Up, Pointer Enter or Pointer Exit.
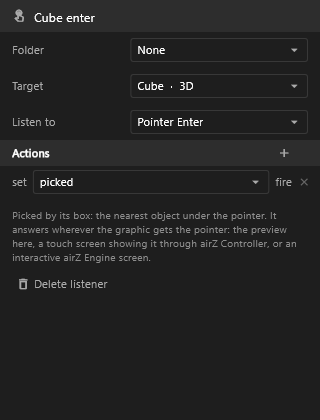
The listener, named for its object and event such as "Cube enter", opens in the Listener inspector with the object as its Target, for example "Cube · 3D"; the target can switch to another object in the same 3D layer. Adding it is one undo step. On a 3D object its actions set a property to a fixed value or fire a trigger: taking a value from another property, and converters, are not offered. The object is picked by its box, the nearest one under the pointer, and it works whether or not viewers may turn the camera. Like a 2D listener, it answers wherever the graphic gets the pointer: see Clicks and drags on air.
Clicks and drags on air
A listener or a drag answers wherever the graphic gets the pointer. In the editor, that is the preview, for trying it. On air there are two ways:
| Where | What happens |
|---|---|
| An interactive airZ Engine screen | A screen output of airZ Engine set up for interactive graphics, touched directly or used with a mouse. The engine's copy of the graphic answers the touch itself, so drags, springs and coasts are as smooth as in the preview. What the presenter does shows on all of that channel's outputs, SDI and NDI included |
| A web link from airZ Controller, on a studio touch screen | The graphic runs in the browser, and the values it sets reach airZ Engine through airZ Controller. Numbers, text, true-or-false values and triggers do; a colour does not yet. On air the values update about 28 times a second, so a fast drag or a coast after Keeps going looks slightly stepped; for smooth motion, use an interactive airZ Engine screen |
Both can change the same graphic, and nothing locks it: the latest change to a value is the one on air. The usual set-up gives a presenter's touch screen an engine of its own, with airZ Controller loading the scene.
In a web link, a 3D layer, and so its listeners and drags, draws only in a browser with WebGPU, and WebGPU works only over an https link or on the machine itself. Opened over a plain http link, the rest of the graphic plays but the 3D layer stays empty.
Shadows
Every shape, model part and 3D text has a Shadows row with two checkboxes, both on to start:
| Checkbox | Off means |
|---|---|
| Casts | The object throws no shadow from any light, traced or not. It still shows in reflections |
| Receives | No shadow falls on it. It is still lit by every light |
Turn Casts off for a glow or a display that should not darken the set; Receives off for a sign that must stay evenly lit. Neither can be keyed. A shadow catcher ignores both.

Detail
Detail swaps in a lighter object far from the camera: choose the Stand-in and the distance Beyond which it draws instead. The stand-in draws only in this object's place, never on its own.
Hierarchy
Right-click a 3D object's row for Rename, Duplicate (Ctrl+D), Group or Group these N, Ungroup, Move to top level, Hide or Show, and Delete. Cameras add Look through this camera.
Duplicate copies the object with its keys in every timeline, so the copy animates like the original, as a 2D copy does. A copy of an object with an Interaction gets numbers of its own, such as "Box 2 x". Data bindings are not copied. One undo removes the copy and its keys.